Accesso
Utenti preferiti
Sondaggio
Homepage
>
Australia
>
Australia Meridionale
>
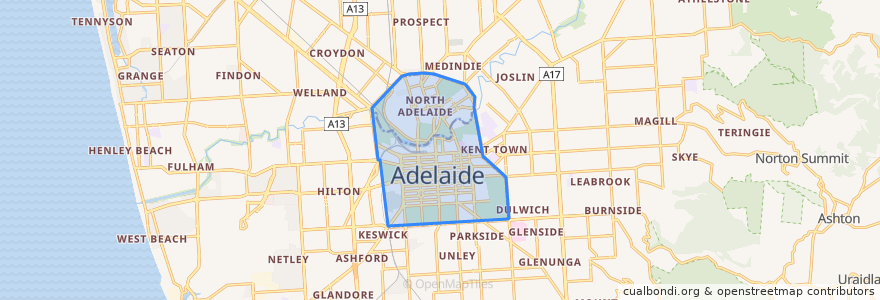
Adelaide City Council
Adelaide City Council
Visualizza nella mappa interattiva
Percorsi di trasporto pubblico
170 - City to Urrbrae
170 - Urrbrae to City
171 - City to Mitcham Square
171 - Mitcham Square to City
172 - City to Kingswood
172 - Kingswood to City
222 - City (King William Street) to Mawson Lakes
222 - Mawson Lakes to City (King William Street)
222R - City to Mawson Lakes via Roma Mitchell Secondary College
224 - City to Elizabeth Interchange via Mawson Interchange
224 - Elizabeth Interchange to City via Mawson Interchange
224F - City to Elizabeth Interchange via Mawson Interchange Limited Setdown
224X - City to Elizabeth Interchange Express to Stop 29 then Mawson Interchange
253X - Mansfield Park to City
98A - City & North Adelaide Anti-Clockwise Loop
99A - City anti-clockwise loop via Town Hall, Rundle Mall, State Library & Museums, Royal Adelaide Hospital and Adelaide Central Market
99C - City clockwise loop via Town Hall, Rundle Mall, State Library & Museums, Royal Adelaide Hospital and Adelaide Central Market
Adelaide bus station => Albury railway station
Adelaide bus station → Bendigo railway station
Albury railway station => Adelaide bus station
Bendigo railway station → Adelaide bus station
Blackwood Station Interchange to City
Bus 719 - City to Flinders University via South Road
Bus 719 - Flinders University to City via South Road
Bus 720 - City (King William Street) to Old Reynella via South Road, Marion Centre & Hallett Cove Centre
Bus 720H - City (King William Street) to Old Reynella via South Road, Flinders Medical Centre, Marion Centre & Hallett Cove Centre
Bus 720H - Old Reynella to City (King William St) via Hallett Cove Centre, Marion Centre, Flinders Medical Centre & South Road
Bus 720 - Old Reynella to City (King William St) via Hallett Cove Centre, Marion Centre & South Road
Bus 721 - Noarlunga Centre Interchange to City via Old Reynella
Bus 721 - Noarlunga Centre Interchange to City via Old Reynella
Bus 830F - City to Lobethal
Bus 830F - Lobethal to City
Bus 863: Aldgate to City
Bus 863: City to Aldgate
Bus 863F: Aldgate to City
Bus 863F: City to Aldgate
Bus T863: Aldgate to City
Bus T863: City to Aldgate
City (Currie Street) - Tea Tree Plaza via O-Bahn
City - Elizabeth Interchange via O-Bahn
City - Fairview Park via O-Bahn
City - Golden Grove Interchange & Tea Tree Plaza Interchange via O-Bahn
City - Golden Grove Interchange via O-Bahn
City - Greenwith & Tea Tree Plaza Interchange via O-Bahn
City - Greenwith & Tea Tree Plaza Interchange via O-Bahn
City - Greenwith & Tea Tree Plaza Interchange via O-Bahn
City (Grenfell Street) - Elizabeth Interchange via O-Bahn
City (Grenfell Street) - Mawson Interchange via O-Bahn
City (Grenfell Street) - Para Hills via O-Bahn
City (Grenfell Street) - Salisbury Interchange via O-Bahn
City (Grenfell Street) - Salisbury Interchange via O-Bahn
City (Grenfell Street) - Tea Tree Plaza via O-Bahn
City (Grenfell Street) - Tea Tree Plaza via O-Bahn
City (Grenfell Street) - Tea Tree Plaza via O-Bahn
City (King William Street) - Glenelg via Unley Road & Raglan Avenue
City (King William Street) - Hove (Dunrobin Road) via Ferry Avenue & Morphett Road
City (King William Street) - Marion Centre via Ferry Avenue & Diagonal Road
City (King William Street) - Northgate
City to Marion Centre Interchange
Elizabeth Interchange - City via O-Bahn
Flinders University - City (King William Street) - Golden Grove Village via O-Bahn
Gawler Central Line (inbound)
Gawler Central Line (outbound)
Glenelg - City (King William Street) via Unley Road & Raglan Avenue
Golden Grove Interchange & Tea Tree Plaza Interchange - City via O-Bahn
Golden Grove Village - City (King William Street) - Flinders University via O-Bahn
Hove (Dunrobin Road) - City (King William Street) via Ferry Avenue & Morphett Road
Marion Centre - City (King William Street) - Golden Grove Village via O-Bahn
Marion Centre - City (King William Street) via Ferry Avenue & Diagonal Road
Marion Centre Interchange to City
Northgate - City (King William Street)
The Ghan
Train BEL: Adelaide Railway Station => Belair Railway Station
Train BEL: Belair Railway Station => Adelaide Railway Station
Train FLNDRS: Adelaide Railway Station => Flinders Railway Station
Train FLNDRS: Flinders Railway Station => Adelaide Railway Station
Train GAW: Adelaide Railway Station => Gawler Railway Station
Train GAW: Gawler Railway Station => Adelaide Railway Station
Train GLAN: Adelaide Railway Station => Glanville Railway Station
Train GLAN: Glanville Railway Station => Adelaide Railway Station
Train GRNG: Adelaide Railway Station => Grange Railway Station
Train GRNG: Grange Railway Station => Adelaide Railway Station
Train Indian Pacific
Train Indian Pacific
Train NOAR: Noarlunga Railway Station => Adelaide Railway Station
Train OSBORN: Adelaide Railway Station => Osborne Railway Station
Train OSBORN: Osborne Railway Station => Adelaide Railway Station
Train OUTHA: Adelaide Railway Station => Outer Harbor Railway Station
Train OUTHA: Outer Harbor Railway Station => Adelaide Railway Station
Train SALIS: Adelaide Railway Station => Salisbury Railway Station
Train SALIS: Salisbury Railway Station => Adelaide Railway Station
Train SEAFRD: Adelaide Railway Station => Seaford Railway Station
Train SEAFRD: Seaford Railway Station => Adelaide Railway Station
Tram BTANIC: Botanic Gardens Tram Stop => Entertainment Centre Tram Stop
Tram BTANIC: Entertainment Centre Tram Stop => Botanic Gardens Tram Stop
Tram FESTVL: Festival Plaza Tram Stop => Stop 17 Moseley Square
Tram FESTVL: Stop 17 Moseley Square => Festival Plaza Tram Stop
Tram GLNELG: Entertainment Centre Tram Stop => Stop 17 Moseley Square
Tram GLNELG: Royal Adelaide Hospital Tram Stop => Stop 17 Moseley Square
Tram GLNELG: Stop 17 Moseley Square => Entertainment Centre Tram Stop
Tram GLNELG: Stop 17 Moseley Square => Royal Adelaide Hospital Tram Stop
Fermate
Stop F1 King William Street - North East side
138.59990720000002, -34.926674000000006
Botanic Gardens
Pirie Street
Stop S1 Hutt Street - West side
Stop W2 Pulteney Street - West side
Stop 3 O Connell Street - West side
Royal Adelaide Hospital
Stop E3 Currie Street - North side
Stop 1 Botanic Road - North West side
Stop I1 Pulteney Street - East side
Stop U2 Victoria Square - North West side
Stop 4 Ward Street - North side
Stop 3 Jeffcott Street - East side
Stop T1 Hutt Street - West side
Royal Adelaide Hospital
Stop O1 Glen Osmond Road - South West side
Stop 1 Victoria Drive - North side
Stop U1 North Terrace - South side
Stop 1 Montefiore Road - East side
138.5990597, -34.911463000000005
Stop H1 Morphett Street - East side
Stop I1 Morphett Street - East side
Stop C1 Morphett St - East side
138.599358, -34.921921600000005
Festival Plaza
Stop H1 Grenfell Street - North side
Stop 2 Frome Road - South West side
138.5988124, -34.9148913
Stop E1 Currie Street - North side
Punti di interesse
Luigi Delicatessen
Bendigo Bank
The Taxpayer
Dominos
Mother Vine
Sparkle at the Whitmore
Flinders Street Project
Jack & Jill's
Soul Origin
Tasty Thai
Chianti
Swordsman's Kitchen
Ragini's
Ding Hao Yum Cha
The Little Red Door
Golden Boy
Snagabag
Peppertones Cafe
Bean Bar
CoCo Fresh Tea & Juice
Funk Coffee+Food
B'Churrasco
Krispy Kreme Rundle Street
Schnithouse
Bendigo
Wendy's
The Lobby on Waymouth
Pizza Boy
Cambridge Balcony Bar
Swann College